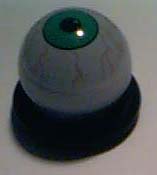
DEMOLITION MAN
The Story of My Floating Eyeball Repair - by Garrett Lee
Updates:
October 20, 2003. Initial release of this page.
The purpose of this web-page is to tell the story of my floating eyeball repair for my Demolition Man pinball machine. This page is NOT A HOW-TO web-page. I only want to tell my story, describe some mistakes that I did and show the result. If you need to repair your floating eyeball then I would expect this page may guide you in the right direction. The primary concept that I want to communicate with this web-page is that a dried-up floating eyeball can be restored to a very good condition. In my opinion, it is a waste of time and money trying to look for a replacement. Obviously this doesn't apply if your floating eyeball has an obvious crack where the liquid escaped. In my case there was no apparent cause for the liquid to escape so it must have escaped through microscopic holes at the metal-bead plug.
Things to understand before reading this page:

Eyeball/Movie Tie In
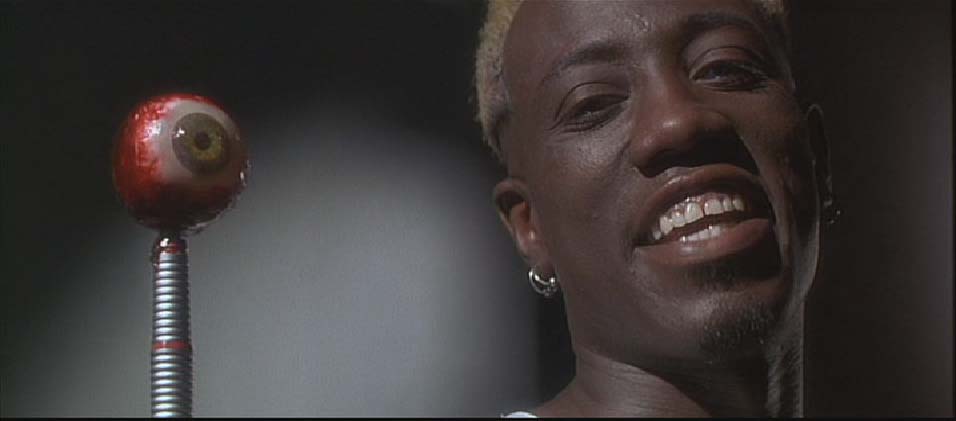
The gruesome movie-still that appears at the top of this web-page is from the Demolition Man movie. Near the beginning of this movie is a scene where the prison warden William Smithers gets his eyeball scanned to enter the CyroPrison. This sets up the idea that the retina-scan is required to get doors to open in this high-security prison (although with the near zero crime of San Angeles, it makes you wonder why they needed such high security in the facility). A following scene where the movie villain (Wesley Snipes) gets loose, he knows that the retina scan is needed for him to escape the room (presumably he knows this from all of the information they fed him while being under freeze). After beating up warden Smithers, he goes up to him and says something like "I'll just need one more thing." The following scene shows the eyeball retina being scanned and then the above image of Snipes laughing while holding the eyeball stuck to the end of a pen (or some instrument). That's it. Now you know why the retina scan is in the Demolition Man machine (if you never seen the movie).
The Problem
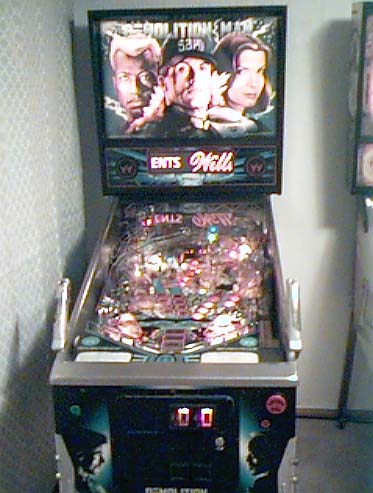
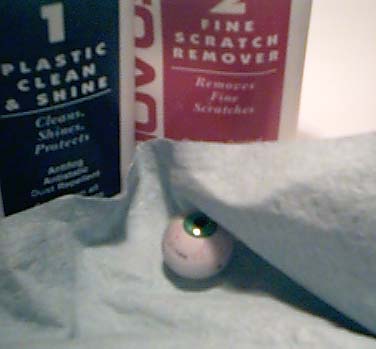
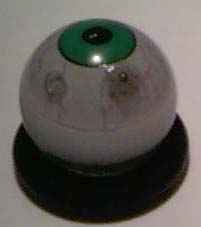
I purchased a Demolition Man (DM) through Ebay during the Spring of 2003. The floating eyeball was unfortunately all dried up. As you can see in the photo below, not only was the exterior of the clear plastic scuffed up, but it seems that over time, the eyeball inside bounced around and scuffed up the inside of the clear plastic also.
I decided to do a complete restoration on the DM starting in the late spring of 2003. It has been a long restoration but finally, here in the fall of 2003 I am nearing the end of the restoration and need to get this floating eyeball looking nice so I can finish installing plastics and ramps. The reason this restoration took so long is because I was pretty busy and mainly worked on it on weekends. Additionally my shop-outs are very intensive, removing every single nut and bolt on the entire machine, polishing everything and then putting it back together (yes I'm one of those 'polish the plumb-bob' guys).
The Search
As luck would have it (or so I thought), Halloween was approaching. I thought that surely a Halloween store would sell some spooky floating eyeballs. This was a MISTAKE. I wasted lots of time searching the internet and searching Halloween, novelty and crafts stores for this 1-inch floating eyeball. Most people didn't know what I was asking for and others didn't believe that such a thing existed. Finally, I had found a costume store that had some floating eyeballs, but they seemed a bit big….
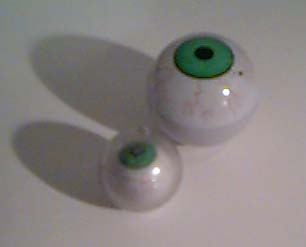
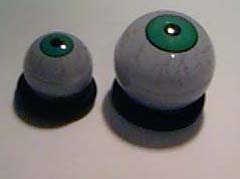
The new floating eyeball was about twice as big as the original (about 2"). Besides the physical size difference, the newer eyeball looked identical to the original 1-inch eye, even with the 'Made in Taiwan' text (okay the original just has 'Taiwan'). Even though the newer ones were too big, I went ahead and purchased 2 green eyes and 2 blue ones for about $1.60 US each.
Sure enough when I tried the new eyeball in the machine, it was much too big and there was no way I could modify things to get it to work. The cat likes playing with it, so there is some good out of this.
I returned to the store and asked some more about these. They said they would look into the 1-inch eyes for me and let me know, however they didn't believe they made them anymore. I have not heard back from the store and figure that the 1-inch variety is no longer made. During my internet search for a place that sells these, I kept coming across references to toy recalls. It seems that the smaller eyeballs were just too enticing for children. In addition to being a choking hazard, they were apparently originally filled with kerosene. With all of these clues, I concluded that a manufacturer would be asking for trouble if they made them this small. It seems very unlikely that they would make the 1-inch for non-toy use, so it is at this point that I decided that I must embark on the journey of restoring and filling my eyeball myself.
The Preparation
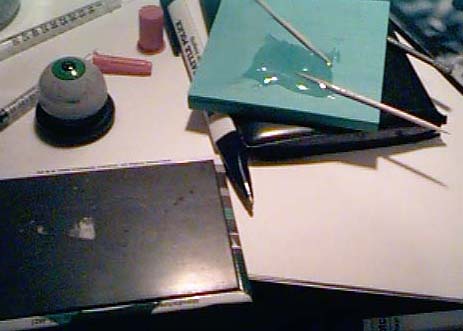
Faced with the challenge of restoring my dried up eyeball, I first began the task of acquiring materials that I thought would be necessary.
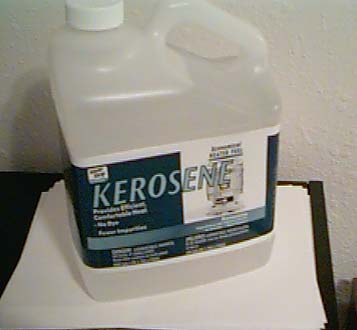
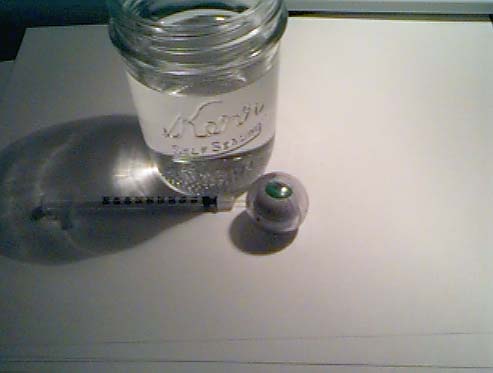
Kerosene. First thing's first. I decided to use kerosene for the floating eyeball's liquid. Honestly the decision to use kerosene came from the toy-recall notices and rec.games.pinball postings that mentioned the fact that the original eyeballs had kerosene. I'll give this filling a yellow warning because there might be better substances, I just don't know what is best. I suppose a chemist would know the best substance, preferable something that doesn't get cloudy over time, doesn't evaporate too quickly, is clear, doesn't change its volume too much in response to temperature changes. If you want to use water instead, I would at least use distilled water because it has no impurities which are likely to cause discoloration or cloudiness. To obtain the kerosene I had to go to several different stores before I finally found a hardware, outdoors, hunting, camping store. I thought I would find this by the lanterns but had no luck. I was about to leave the store when I found an isle with paints, paint thinners and paint strippers. This jug of kerosene was with the paint strippers (not sure why, but I'm happy to have found it). This jug is 1 gallon (3.785 litres) and cost me around 5 US dollars. Kerosene does look a lot like water. I will say this only once, do not leave any containers of this sitting on the table if you have kids or animals!
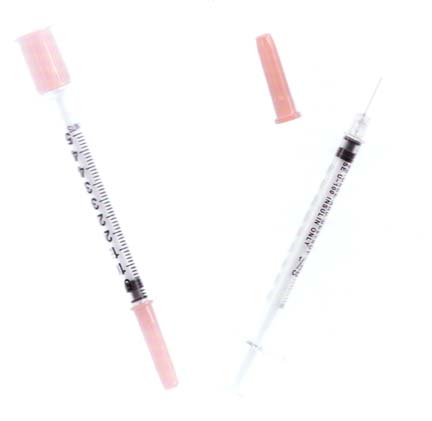
Syringes. I can see that about the only way to get fluid into the eyeball is with a syringe. I don't know a common source for these but was able to obtain them through an uncommon source. I would guess that one could find these in a drug store. They may be unavailable to the general public and you may need to bring in your eyeball (your floating eyeball) and show it to an employee explaining that you are looking for a few syringes for filling up the eyeball with fluid. If you can't find the syringes by themselves, they me be in some sort of emergency kit for bee stings or an insulin kit which you may be able to buy. I have to mention that the syringes deserve a green rating because I couldn't imagine how else I would have gotten the fluid into the eyeball.
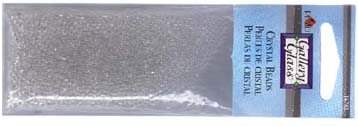
Crystal Beads. MISTAKE. I noticed that the original eyeball is plugged with a little metal bead. You can see this bead on the oversized eyeball in the picture above. My original plan was to replace the metal bead with a glass bead, I thought it would look better than the metal. As it will turn out, I end up using the original metal bead to plug the hole because these beads were just a tiny bit too big. I found these beads at a crafts store called Michaels (common in the United States). These were only $1.50 US so it wasn't a big deal that I didn't use them. I am listing this unused item just in case you decide to go this route, you must remember to use very small beads, but not so small they fall through the hole in the eyeball (it would be very difficult to get the bead out of the eye if it falls in!

Plastic Polish. I think most pinball hobbyists are familiar with the Novus plastic polishes. These were very helpful in the restoration of my eyeball so I will give this a green recommendataion because I couldn't imagine getting the eyeball restored without these polishes. I used all 3 polishes but you could get by with only Novus 1 and Novus 2. You can usually order these from the online pinball parts retailers.
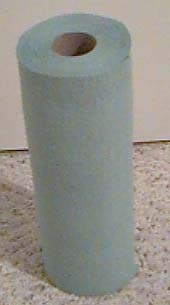
Blue Towels. These are a slightly heavier-duty towel than standard kitchen paper towels. I use these blue towel for all sorts of different things during the pinball restoration, in fact this is the 3rd roll that I used during my Demolition Man restoration this summer. I buy these at a hardware store and have seen them at department stores and automotive stores also. Of course you can use any suitable replacement for the blue-towel. This is only mentioned to remind you that you need disposable towels of some sort.
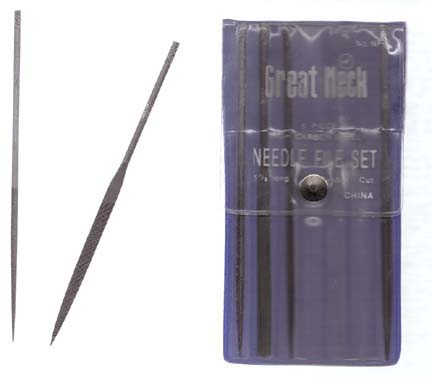
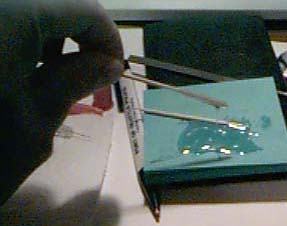
Needle Files. These are very small and tough files. This particular file set comes with 6 files which are 5.5 inches (14 centimeters) long. This set happens to have an assortment of needle shapes such as square, triangle, semi-circle, flat with pointy tip, flat with flat tip and most importantly was the round file. The little round file is similar in shape to a round wood toothpick (at its tip) which came in very handy for the metal-bead-plug extraction. I will give the needle files a green rating because I really can't think of a nicer way that I could have gotten the little metal bead out of the eyeball (described later). You might be able to substitute razor blades or exact-o knives in place of the needle files. The metal-bead extraction described later will give you some idea what is involved.
I received these needle files from a good friend and co-worker for Christmas 1999 (thanks Cary!!!). I would bet he would be surprised to know how many times these files have came in handy for various projects. I would imagine you could find these at some specialty hardware stores. If you have trouble, you may want to try a locksmith or maybe a crafts store. My particular set was manufactured in China and has the brand name "Great Neck" with model number "NF-6". Remember, I only used the round toothpick-like file, so you don't need to search for the entire kit.
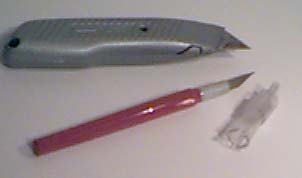
Small Knives. These are not essential, but due might come in handy. I only needed these to correct some mistakes I've made during this process (which will be described later). Pictured on top is a standard 'box cutter' knife. Below is a smaller knife for more precision cuts. The smaller one is often sold under the brand name "Exact-o Knife". To the right is just a safety cap for the smaller knife. These knives are around 2 or 3 US Dollars at various hardware or crafts stores.
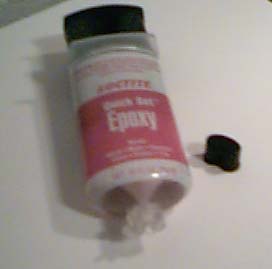
Epoxy. This is what I ultimately end up using the plug the hole (after a failed attempt using another method described later). I don't have any long-term usage of my eyeball with the epoxy plug, so I have to mention this is a yellow rating. It could certainly be possible that after several plays the epoxy breaks off (of course I'll update this web page if such a thing happens). This particular epoxy is by Loctite, and is the "Quick Set" type. I prefer this because it sets, well, quickly. You can try other types and brands of epoxy but it is important that the type you get dries to a clear appearance. You should test other types of epoxy before using to make sure it dries clear. I purchased this at a hardware store for about 3 US dollars. If you don’t know what epoxy is, I'll get into the details later in this web-page.
One alternative to using epoxy may be to use super glue. Super glue is much thinner than epoxy and not leave a bump like the epoxy does (described later).
Time and Patience. If you rush the process you may not get good results. For me the process took around 3 weeks. I was pretty busy with work and things so you should be able to get this done much quicker. The ultimate goal will be to get the ball all filled with NO AIR BUBBLES. Much of the time that I spent was trying to ensure that the final result is 100% perfect (we will see that this is very hard to achieve). Remember this web-page is only describing my story so you can form your own plan of action and form your own procedure and timeline.
The Procedure
The following will describe everything I did to get my eyeball all cleaned up and refilled. I will describe everything I tried so that you can get an idea how to approach your own eyeball restoration. I made a few mistakes along the way and hopefully you can benefit from my mistakes and save a bit of time in the process.
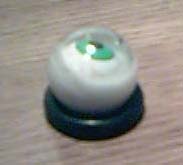
Initial Polishing. The very first thing that I did was polish the exterior of the dry eyeball plastic. The above example picture was taken with the final eyeball all filled, hence it is already shiny! I was a little obsessive about this and spent about an hour polishing the ball while watching a television show. I mainly used Novus #2 and #1 but spent a little bit of time using #3 just to make sure I got it really polished up. Since the inside of the plastic was scuffed up, it was difficult to see the fact that the exterior of the clear eyeball plastic was polished.
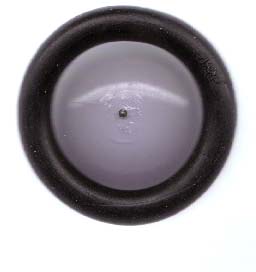
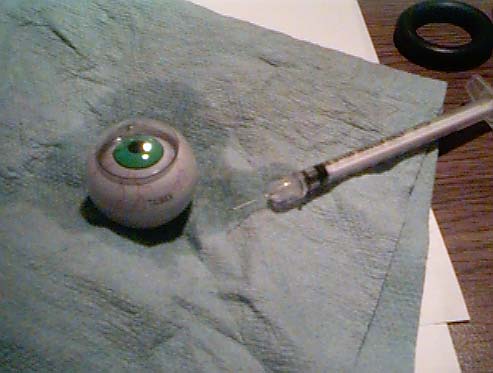
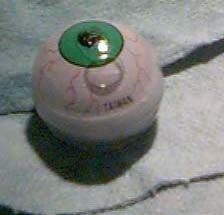
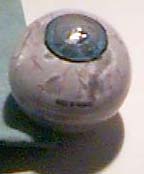
Metal-bead, Plug Removal. Above is a scanned image of a floating eyeball (one of the newer larger ones) sitting on a rubber ring to keep it from rolling all over my flatbed scanner. As you can see, there is a tiny metal bead that the manufacturer uses to plug up the eyeball. It appears they smudge a little melted plastic over the bead to seal it up.
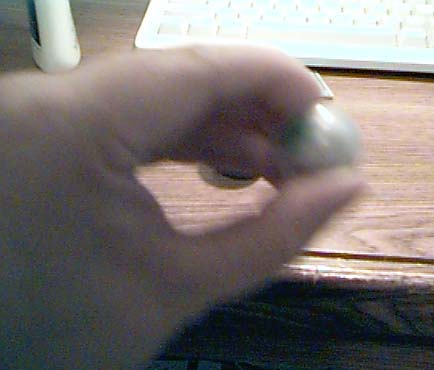
Removal of the metal bead is very tedious and requires a lot of time and patience. Most importantly, be careful. You don't want to lose the bead! It turns out the bead sticks to magnets so you may want to have a bunch of them around to grab the bead if you drop it. In fact, I would recommend that you work on removing the bead while laying on the floor on a large sheet (or blanket). Take your time and be very careful as the bead could potentially pop out and fling across the room (as we'll see, this did happen to me later in the process).
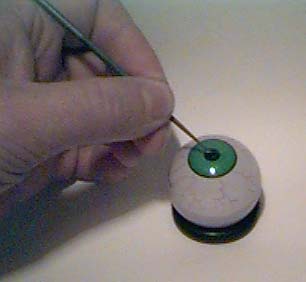
The above picture shows pretty much what was involved in removing the bead (picture is demonstration using the larger 2" eye). What I did was take the thin file-tip and work around the bead, gently forming a little trough or moat around the bead. Take extreme care to never apply any force against the bead, you don't want to press it into the eye! After about 30 minutes of gently exposing the sides of the bead, I finally decided that I had enough of the bead showing that I can work on getting it out. Using the tip of the file I applied sideward force to the bead, gently pecking at it until the file grabbed the bead out. This is important to note that the metal bead is easier to remove than a glass bead would be (we'll see later that I choose to put this original metal bead back in the eyeball after I fill it up). In my case, the bead actually fell onto a carpeted floor, I was very lucky to actually find the bead within a couple minutes! At the time I was planning on using the glass beads later-on so I didn't know how lucky I was to retrieve the original bead from the carpet.
Here is a scan of the actual eyeball with the bead removed. If you look carefully you can see the little groove I filed around the bead-hole. You can also see that the eyeball plastic is scuffed up. Since I already polished the exterior of the eyeball plastic, all scuffing is on the inside wall of the clear plastic, caused by the eyeball banging around against the clear plastic over time.
I should mention that an alternative method of getting the bead out MIGHT be to use small sharp knives such as "exact-o" knives or razor blades. This is all up to you how you want to remove the bead.
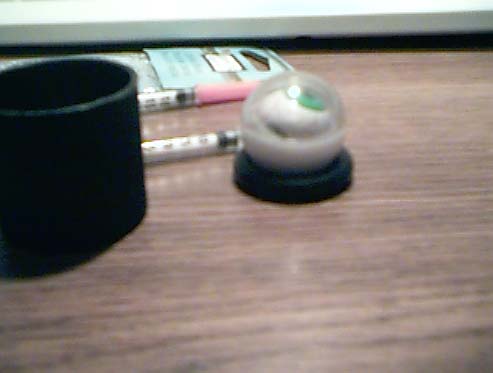
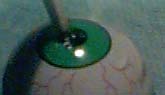
Filling Eyeball With Plastic Polish Novus 1. For this next step I poured a bit of the Novus 1 polish into a bottle-cap. The Novus 1 is about the consistency of low-fat milk. I next used a syringe to get the Novus 1 from the bottle-cap into the eyball. You can see in the above picture where I gave my eyeball its first taste of moisture in probably several years. Images of the American television commercial "For Dry, Red eyes" with Ben Stein come to mind whenever I think of this step. You can also see how nicely the small pinball rubber ring works as a little eyeball-stand.
Shaking. As you probably guessed, the after I put Novus 1 into the eyeball, it was shakin' time. I shook the eyeball constantly for exactly 1 hour. After about 10 minutes of the shaking I stopped briefly and put more Novus 1 in the eye than what is shown in the picture above. I would say that I had the eye about 75% filled with Novus 1 for most the shaking. I spent an hour shaking the eyeball and watching a television program to keep me occupied. I think this was the most important step for clearing up the scuffing inside the clear plastic. I will give this a green rating as this step is strongly recommended if you have any scuffing of the clear plastic inside your eyeball.
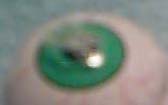
Above is a picture that I took after the 1 hour of shaking. I was very happy to see that the inside of the plastic cleaned up really well. Things were going really good…. or so I thought…
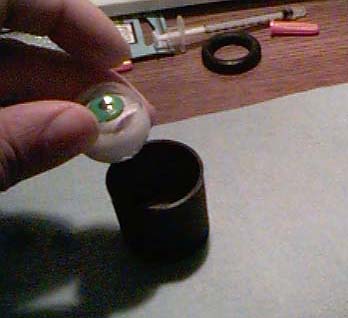
Removing the Plastic Polish Novus 1. Now I was faced with a challenge of getting the Novus 1 out of the eyeball. Honestly I never gave it any thought how I would do this up until this point. I had pretty good luck for the most part simply shaking the eyeball with the hole facing down. Here in the photo above I was just shaking it into the plastic bottle cap. MOST of the Novus 1 came out this way but there was just a tad bit left in the eye that I couldn't seem to get out.
I decided that I could inject some of the kerosene into the eyeball and mix it around and then shake it out. Perhaps doing this a few times would wash all of the polish out. Of course I was thinking the kerosene would mix with the polish, diluting it. This was a mistake! It turned out that kerosene and Novus 1 do NOT MIX in any way. The two substances remained completely separate while inside the eyeball. (I have no pictures of this mess, I was pretty frustrated at the time). DO NOT ADD ANY KEROSENE UNTIL THE VERY LAST STEP!
Using the syringe and a bunch of shaking I eventually got most of the kerosene out of the eyeball but there still seemed to be a bit of the Novus 1 that would splotch against the side of the plastic wherever the eyeball touched the inner wall of the clear plastic sphere (if this makes any sense). What I did was try my best to "wash out" the inside of the eyeball. I took ordinary tap water and used the syringe to put a little bit inside the eyeball. I shook it around a bit and then shook it out. Looking back I should have at least used distilled water, it would have been better.
No matter what I tried, it still seemed there was a bit of Novus 1 in the eye which, as I mentioned, was apparent by the smudge it made where the inner eyeball touched the inner wall of the clear ball. I decided that the best thing to do at this point is to simply let it dry-out. I was hoping after it dried out the kerosene would not cause any dried-out Novus 1 to become visible (which was a good assumption).
As for what I should have done, I can suggest that you can try letting the Novus 1 dry out without adding anything to wash it out, <OR> it may certainly be beneficial to spend an hour washing out the inside of the eyeball before letting it dry out. If you choose to wash out the Novus 1, remember do not use kerosene. I would recommend water or distilled water if you can find it. I think I've seen distilled water for sale at grocery stores by the ironing items, distilled water is good for cloths irons (I believe).

Drying the Eyeball. Regardless of you how handled the previous step, the eyeball should be dried out completely before adding the kerosene. I gave a whole week for my eyeball to dry out. During the days I simply set the eyeball on a table and let the natural air dry thing out (hole facing upwards). In the evenings I set it on top of a stereo receiver that tends to get very hot while I'm using it. I set it there with the hole facing downward so that the heat will rise out of the stereo into the eyeball. I think setting it on the stereo really helped get it dry so I will mention this with a green rating. You may be able to come up with alternative ways to dry out the eye. Whatever you do, be careful not to damage the eye with too much heat. I closely monitored the drying progress on the stereo and removed it each night. You may also try the top of your computer monitor or television set if you can find some air vents where warm air escapes.
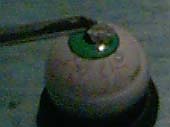
Filling the Eyeball. This is the fun part. Very carefully (and over some paper towels) use the syringe to inject kerosene into the (now dry) eyeball. This actually takes a bit of skill as you need to realize that as you are pushing kerosene into the hole, at the same time air needs to escape from the same hole! This is a messy process as the escaping air likes to push the kerosene OUT instead of in while you're squeezing the syringe. Eventually you can get the eyeball pretty much filled up.
As you can see, this gets a little messy. I should have done this with more than just 2 paper towels underneath, you may want to have some scrap wood underneath to absorb any spilled kerosene. My old desk seemed to hold up but if this was a piece of fine furniture I would have been more careful. (tip, don't do this on fine furniture J ).
I was trying to be very careful not to poke the eyeball with the needle of the syringe. I will find out later that it will become absolutely necessary to touch the eyeball with the syringe and also that it didn't seem to damage the eye in any way. This will be described later where I do the topping off of the kerosene. At this time, I didn't want to touch the eyeball with the syringe and I had this stubborn air-bubble that I could not seem to get out. If you actually DO this, you will see what I mean, the casual reader may think "just use the syringe and squirt the kerosene in the bubble", well it turns out to be a little more difficult than that.
With the one air bubble there I decide to move onto the next step that I was planning on….
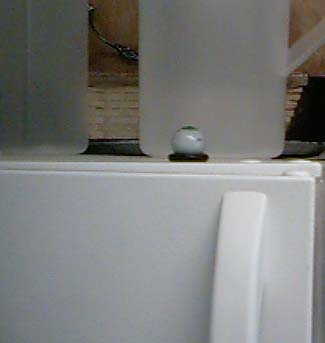
Battle of the Air Bubbles. I believed that the most important end-result is to have NO air-bubbles in the eyeball. I decided that there could be a bunch of small, microscopic air bubbles that could exist in the kerosene and in the plastic eye in microscopic crevasses. I decided to put the eyeball on top of my refrigerator for 1 week. I thought that the small vibrations of the compressor would be just enough to gently shake out any microscopic air bubbles and let them all gather together to join the one larger air bubble. Each night I would gently shake the eyeball to stir things up a bit and let the air bubbles form their town-hall meeting. I have no idea if this 1-week delay in the project actually helped or not. The air-bubble DID get larger after the end of the week but that could have been simply due to evaporation of the kerosene. Performing this step is all up to you, but I do recommend at least 1 night on the fridge to see if you think you are getting any microscopic air bubbles out.
Topping It Off. This is a very important set of instructions. After the 1-week refrigerator experiment, I went back to some final kerosene injections. It was very difficult getting that last air bubble out. I finally figured out what was necessary:
This technique seemed to work pretty good for me, once I got the hang of it. I did however make a mistake and squirted some air-bubbles into the eyeball. After doing this I decided to set the eyeball on the fridge for a few days.
A note on the syringes. I had a tough time with them for awhile. It seemed the rubber inside didn't like the kerosene and the syringe became very difficult to operate after awhile (I had several of them which I had gone through). Later I realized it was working best for me to have the plunger mostly pulled out of the syringe and work with it that way. For example, I had the plunger pulled out 60%, then sucked up some kerosene by pulling the plunger out another 30% or so. This resulted in a large column of air in the syringe but it seemed to operate better this way. Next I make sure I only press down enough to inject the kerosene and not let any air get injected. I hope this makes sense.
Plugging the hole and Sealing it. It was at this time that I tried to use one of the crystal beads to plug the hole. I quickly realized that although very small, the beads were just a tiny bit larger than the metal bead. The crystal bead would not fit into the hole fully and left the surface of the eyeball with a little bump there. I also decided that perhaps the metal would have a better plugging property than glass for some reason. I can imagine microscopic holes around the glass bead that the kerosene would find. This is a red comment that the glass beads were not used.
Luckily I taped the metal bead to a piece of paper and still had it handy.
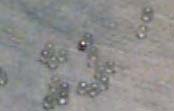
Here is a photo of the metal bead around the crystal ones. The metal bead was just a TINY bit smaller. I might have been able to dig through all of the crystal beads and find one that was smaller than the rest but didn't want to spend the time doing that.
As you can imagine, the next step is simply placing the metal bead into the hole and gently pressing it down Don't press down very hard, just enough to get the bead into the hole. We will soon see a comment that I learned if you press down too hard…. air bubbles!! Just before placing the bead in the hole, make sure it is all filled with a small puddle of kerosene. I will also soon learn that the simple act of placing the bead there actually is pressing a tiny bit of air into the hole!
Suddenly I was faced with a realization that I didn't really consider how I'd seal the plugged hole! This in itself was a pretty big mistake. The whole time I was thinking that it wouldn't be a big deal and I would just need to plug in my soldering iron, clean its tip, and "wipe" some of the existing plastic surrounding the plug over the hole. It turned out, that I had a big puddle of kerosene there where I was planning on "wiping". It doesn’t seem that a hot soldering iron and kerosene is a very good combination.
At this point I was worried that the kerosene might start evaporating in the air-exposure so I knew I had to act quickly. I decided to sacrifice one of the blue-eyed 2-inch floating eyeballs that I purchased earlier. I used a razor blade and scraped a bunch of thin pieces of its clear plastic. Next I took these thin pieces of plastic and placed them over the plugged hole and used the soldering iron to melt them down to seal the hole. I was imagining that the shreds of plastic would melt to an nice, clear plastic filling. Turned out this entire thought was bad and another mistake, don't do it.
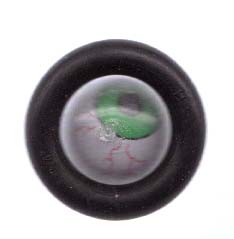
First of all, as you can see there is already an air bubble forming in the eyeball which drove me crazy. This air bubble seemed to be caused by the heat of the soldering iron. Apparently the heat from the iron caused some evaporation of the kerosene near the plug which, of course, caused air to enter through the sides of the plug (due to the pressure difference after some kerosene evaporated). Additionally, I was trying to get the plastic slivers to melt with the existing plastic of the eyeball to get a good mix of the plastics. To do this I had to press down a little with the soldering iron. Pressing down caused some kerosene to squish out of the hole, around the plug. This resulting in a little more air getting into the eye. As you can see, things were quickly going downhill. For those of you skimming this web-page, here I'm describing a mistake that you should not do. I'll have an alternative solution below.
End Result After Attempt Number 1. The photo above shows the plugged hole with the melted plastic slivers on the right. To the left is the air-bubble. I will discuss this a bit more later, but my air bubble always seems to be off to the side and not at the very top of the sphere. Another negative result is that the melted plastic flakes turned to a yellow color when they got melted/burned. The final straw (which drove me to take another shot at this) is that when I tapped the plugged hole with my finger, I could see air bubbles enter the eye! My seal was horrible. Back to the drawing board.
At this point I decided to start over on the plug. I used the knives (box-cutter and exact-o type) to cut away the melted plastic flakes. The broke off surprisingly easy. I guess I should not go into plastics for a living. I cleaned up the hole and it looked just as good as before. Next I used the needle-file to get the metal bead back out of the eye. During this I made a big mistake and let the metal bead fling out of the eye while trying to get it out with the file. This time I wasn't so lucky as the original bead-extraction. I couldn't find the bead so I decided to go back to my sacrificial blue 2-inch eyeball and use its metal-bead. The beads between the new 2-inch eyes and the original eye looked identical (they were). I got the metal bead out of the new blue eye and made sure to handle it very carefully.
I put the bead into the eyeball. Again, it is important to make sure there are no air bubbles. At this time I had to do the procedure described earlier for getting that last air bubble out of the eye with the syringe. I should have placed the eye on the fridge again because all of this activity could have caused some tiny air bubbles to get in there which need time to accumulate. This would be a mistake that I didn't exercise patience because my end result DOES have an air bubble.
When placing the metal bead into the eyeball I should have ensured the bead went into a big puddle of kerosene. I may have pressed a tiny bit of air into the hole with the bead because when this process is all done, I pick up the eye and rotate it in my hand and a small air bubble appears to come from the plugged hole, in reality it could not have come through the hole, rather it was just sitting there under the bead waiting for me to rotate the eye so it can make itself known.
Epoxy Preparation. I've been leading up to this epoxy application. I decided that the attempt number 2 for my eyeball plugging will use epoxy. Epoxy is basically a very strong glue. Epoxy consists of 2 different substances that must be mixed together just prior to application. Sometimes you can buy epoxy in two separate tubes (that come in the same packaging), or the epoxy that I have pictured earlier in this web-page is a single tube that has 2 separate chambers, keeping the 2 substances separate.
I simply pressed the epoxy substances onto a piece of paper and used round toothpicks to mix them together for about 30 seconds (follow instructions on epoxy tube). As you can see in the picture above, the epoxy is almost like a liquid plastic. I've used this to fix playfield plastics in the past, it is very tough. In the photo above I should say that I probably should have used white paper instead of the blue note-pad. The dye from the colored paper could have mixed into the epoxy. I didn't think of this until after I already mixed it up with the toothpicks.
Additionally, in a picture above you can see a large refrigerator magnet that I used to catch the metal bead if I dropped it. This turned out to be handy because I did drop it while trying to plug the eyeball!

This particular epoxy sets in about 10-15 minutes so I let it sit for about 2 minutes after mixing so that it was just a little bit thicker than corn syrup. Then I used the toothpick to gently apply just a few drops to the plug. The epoxy naturally smoothes out a bit around the area where I apply it. After another 7-10 minutes I took a paper towel and tried to smooth down the lump of epoxy. This caused the epoxy to not look very smooth so I put a little bit more epoxy on the area to smooth it out. I would classify that as a mistake, I probably should have just stuck with the initial application of epoxy and been done with it. The end result will be an eyeball with a little bump at the plug where the epoxy is.
Keep in mind that if you choose to use epoxy, I do not have long-term play of the eyeball with the epoxy plug. I don't know what the long term effects are, or if the epoxy will get brittle and break of. I will update this web page if such an event occurs.
I mentioned earlier in this web-page that super glue may be a good alternative (I really don't know). Since super glue is much thinner than epoxy, it can dry without leaving the lump that the epoxy leaves. It is also possible that the original manufacturer used super glue and it obviously didn't hold up. This is all up to you what you choose for sealing your plug.
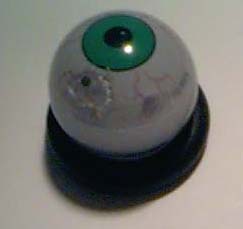
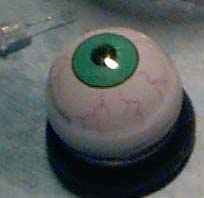
End Results. It is hard to believe that I'm finally done. I was (as usual) busy with other things so I let the eyeball sit for several days to make sure the epoxy was completely dry before I messed with it. The picture above doesn't give it much justice because there is some reflection of the epoxy with the lights in the room. In real-life the epoxy doesn’t look bad at all. It is a little bit of a bump on the eyeball but it is not like this feature gets hit THAT often during typical game play.
You can see in the picture above the bubble is off to the right (just to the left of the Taiwan text). So far this bubble hasn't changed in size, it is just a tiny bit smaller than the black pupil of the eye. I have decided quit while I'm ahead and not let the air bubble bother me. I think if I had to do this over again, I would have set the eye for a few days to let the air bubbles collect just prior to plugging (like my original intentions were). Next I would have had a bigger puddle of kerosene sitting at the hole when I drop the bead there. I would have been VERY careful when pressing the bead down and then apply the epoxy over the puddle of kerosene instead of wiping the kerosene away. This may require an experiment to see how the epoxy and kerosene mix but the hope is that the kerosene would dry up or mix into the epoxy, the end result being that no air gets into that plug during the sealing process.
The fact that I still ended up with an air bubble after 3 weeks, shows that this web-page is only a guide. I hope that if you tackle this process you can be a little more careful than I was toward the end and try your best to win the battle of the air bubbles.
I am not sure if this was intended but the shape of my eyeball keeps the air bubbles from forming at the very top (at the pupil). My pupil is shaped just right so that it is very close to the clear plastic and the air-bubble doesn't get the chance to get there. The air bubble is content to hang around the edge of the iris and not really get in the way, so I'm happy with that.
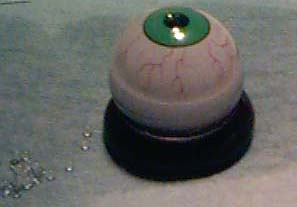
This picture is a little more flattering, the plug is on the bottom side and the air bubble is hiding at the back.
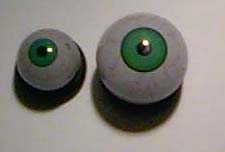
Here are some comparison pictures of the newly restored eyeball and the newer 2-inch one. My digital camera doesn't do much justice, in real life the restored eye looks pretty good in comparison to a new one.
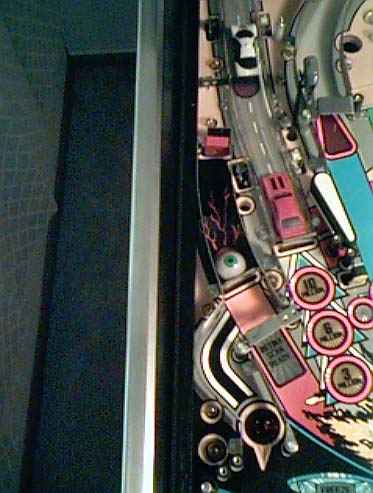
All Done! At last I can finally finish my Demolition Man restoration. It's hard to believe that a 10-second joke in a movie ultimately caused me 3 weeks of restoration dedicated to this thing.
I welcome any feedback you have on this web-page. Like my Indiana Jones shop-out guide, I'm always happy to hear that my web pages have helped or inspire someone to tackle a project that they previously thought was impossible.
ß ß Back to home page.